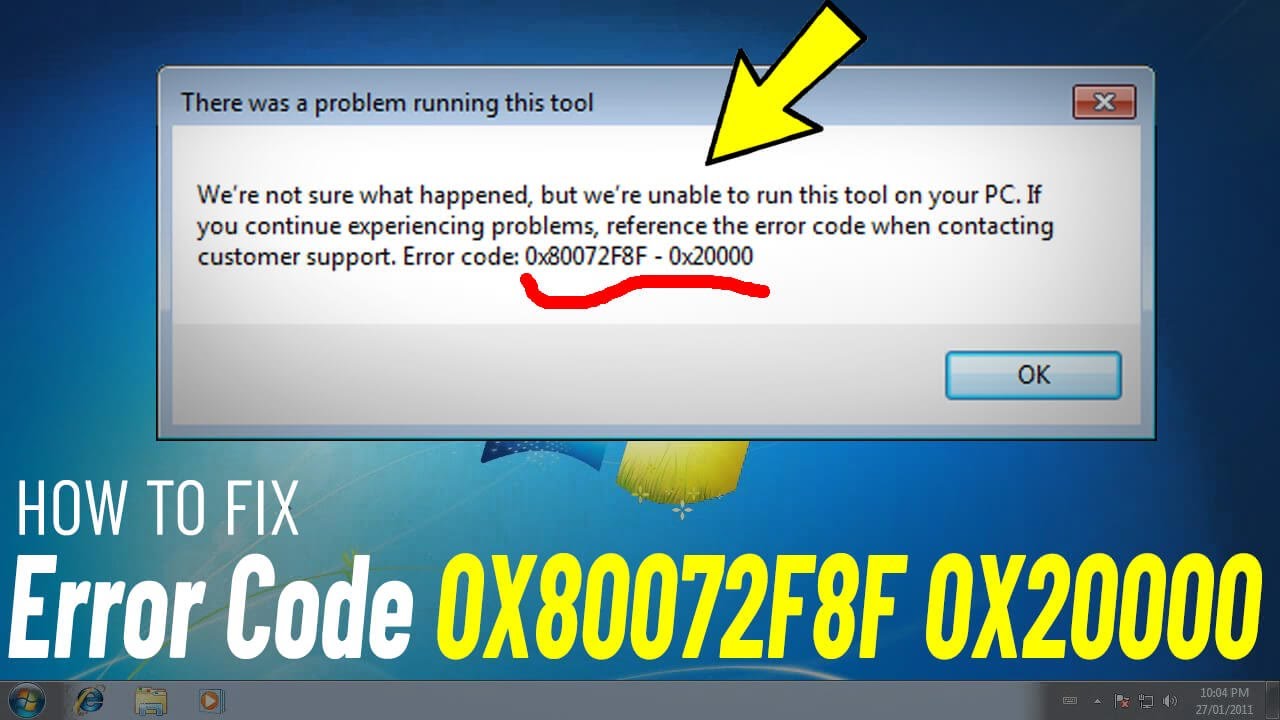
How To Fix Error Code 0x80072F8F 0x20000 On Windows will be described in this article. Are you also experiencing the issue code 0x80072F8F 0x20000 with Microsoft Media Creation Tool and are you trying to find a solution? If so, you’ve come to the correct website. A frequently encountered error code when attempting to upgrade Windows OS via Media Creation Tool is 0x80072F8F 0x20000. The inability to update your operating system due to this error number can be annoying.
How To Fix Error Code 0x80072F8F 0x20000 On Windows
In this article, you can know about How To Fix Error Code 0x80072F8F 0x20000 On Windows here are the details below;
The worst thing about this situation, though, is that Microsoft has not released any official material outlining the precise reason why this error code occurs. Fortunately, there are a few workarounds you can use to quickly resolve the issue.This post goes into great length regarding the meaning of the Media Creation Tool error number 0x80072F8F 0x20000, the reasons behind it, and—most importantly—how to resolve it. Now let’s get started without further ado.
What is Error code 0x80072F8F 0x20000, and why does it occur?
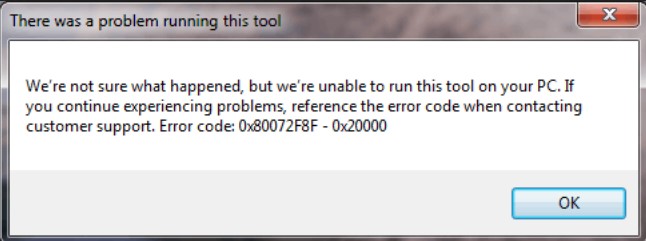
The error code 0x80072F8F 0x20000 is thought to be caused by a server that Microsoft Media Creation Tool is attempting to connect to but no longer supports TLS 1.0 security protocol, despite the fact that this is not an official statement.
That being said, it is merely conjecture based on the troubleshooting techniques that have been successful for most customers experiencing the same issue.
In addition, the following other factors could result in the Media Creation Tool error number 0x80072F8F 0x20000:
- Corrupted Temporary or Cache Files: When installation files are downloaded and run, your computer generates temporary and cache files. Despite the fact that these files are crucial, if they get corrupted, they may cause issues with Microsoft Media Creation Tool and result in this error.
- Conflict between Third-Party Apps: Occasionally, installed third-party apps on your computer may conflict with the Microsoft Media Creation Tool, resulting in this error message.
- Absence of Admin credentials: Microsoft Media Creation Tool requires administrator credentials in order to make system-level modifications. This error code 0x80072F8F 0x20000 may be occurring because you are using your computer as a guest user or because you are not granting this tool admin access.
- Incompatible System Requirements: In order for your device to upgrade its Windows operating system and install it correctly, it must meet the minimal requirements. This issue may occur if the Windows OS version you wish to upgrade to and your existing system specifications are incompatible.
- Absence of vital Services: In most cases, issues such as error code 0x80072F8F 0x20000 can arise from the inability to provide certain vital services, which are necessary for the effective operation of software such as Microsoft Media Creation Tool.
- Instable Internet Connection: Several users have reported that this problem was caused by an unreliable internet connection. While not all users will experience this, if your internet connection is unreliable, it would be wise to try updating your operating system again as soon as it stabilizes and begins to function at a respectable speed.
After learning the potential causes of this problem, let’s talk about some of the finest remedies you may use to resolve it.
Ways to fix Error code 0x80072F8F 0x20000
As previously said, Microsoft has not provided an official explanation for the cause of this problem. Because of this, our workarounds are based on fixes for the same issue that other Windows users have found to be effective.
1. Run Media Creation Tool as Administrator
As previously stated, you can update your Windows OS and perform system-level modifications with the aid of the Microsoft Media Creation Tool. As a result, it needs administrator rights and privileges, and the error may be occurring because you do not have administrator access.
The lack of administrative rights in the user account you are presently using could be the reason of this problem. In this case, the problem might be resolved by using the Microsoft Media Creation Tool as Administrator.
You must perform the following easy actions in order to start Media Creation Tool as an administrator:
- Go to the location where the Microsoft Media Creation Tool file is kept first.
- After you find the Media Creation Tool file, give it a right-click.
- Choose Run as manager from the context menu.
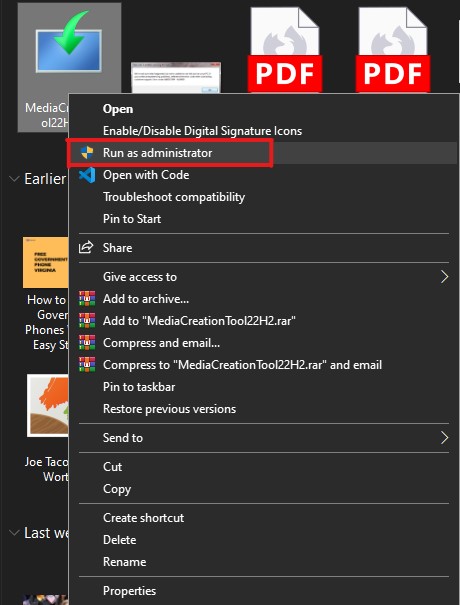
- To fix error code 0x80072F8F 0x20000, run Media Creation Tool as administrator.
You’ll get a UAC window on your screen requesting confirmation of your selection. To confirm, just click the Yes button.
I’m done now. You can grant administrative rights to Microsoft Media Creation Tool in this way.
Check to see whether the problem has been fixed now. Try implementing the next workaround if it isn’t.
2. Enable TLS 1.1 and TLS 1.2.
This is among the most often reported causes of error code 0x80072F8F 0x20000. This may be the result of an outdated TLS version being enabled on your machine.
You may create safe, encrypted connections over the internet with TLS. The majority of old Windows PCs are limited to having TLS 1.0 and SSL3 enabled.
Microsoft, on the other hand, upgrades the security protocols TLS 1.1 and TLS 1.2 for its servers.
Every time your machine tries to connect to a Microsoft server, the connection fails and displays the error number 0x80072F8F 0x20000. This could be the result of TLS versions being incompatible.
You must enable TLS 1.1 & TLS 1.2 in order to resolve this issue.
To accomplish that, there are two methods.
- Using the GUI, enable from Internet Settings.
- Modify the register as necessary.
Both of these techniques have been discussed below.
Enable TLS 1.1, TLS 1.2, and TLS 1.3 using GUI
You must take the following easy actions in order to use the GUI to activate all of these TLS versions:
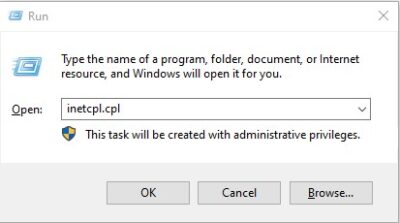
Start by opening the Run window. Press the Win+R keys on your keyboard to accomplish this.
- After typing inetcpl.cpl, press Enter. You will then be able to open the Internet Properties window.
- Start Web Properties.
- Go to the tab for Advanced.
- In the list of settings, scroll down and choose TLS 1.1, TLS 1.2, and TLS 1.3.
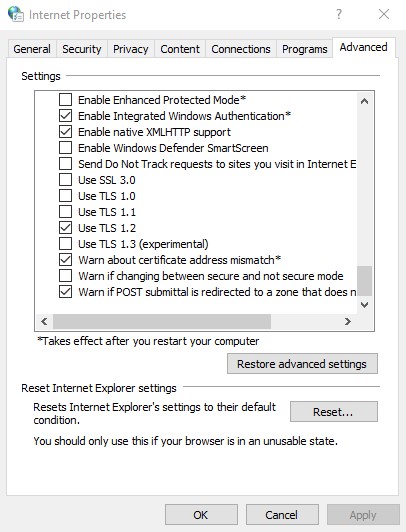
- In order to save all of your changes, click the OK button.
- To make all of the changes, click the make button now.
- Turn your computer back on.
Run the Media Creation Tool again after that to see if the fault has been fixed.
The only way to enable TLS 1.1 and TLS 1.2 if they aren’t shown on the list is to make adjustments to the registry file.
Enable TLS 1.1 and TLS 1.2 by making changes in Registry
Disclaimer: Firstly, let me tell you up front that this method involves making modifications to the registry, which could be dangerous if something goes wrong. Making a backup of the existing registry is highly advised.
To make a backup of the current registry, just follow these easy steps:
- Start by using the Run command. You must use your keyboard’s Win+R key to accomplish this.
- Type regedit into the comment box and press Enter. The Registry Editor will open as a result.
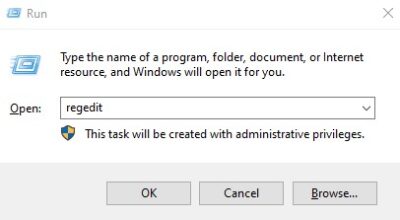
- Start the Registry Editor.
- Select the File tab & then select Export from the drop-down menu.
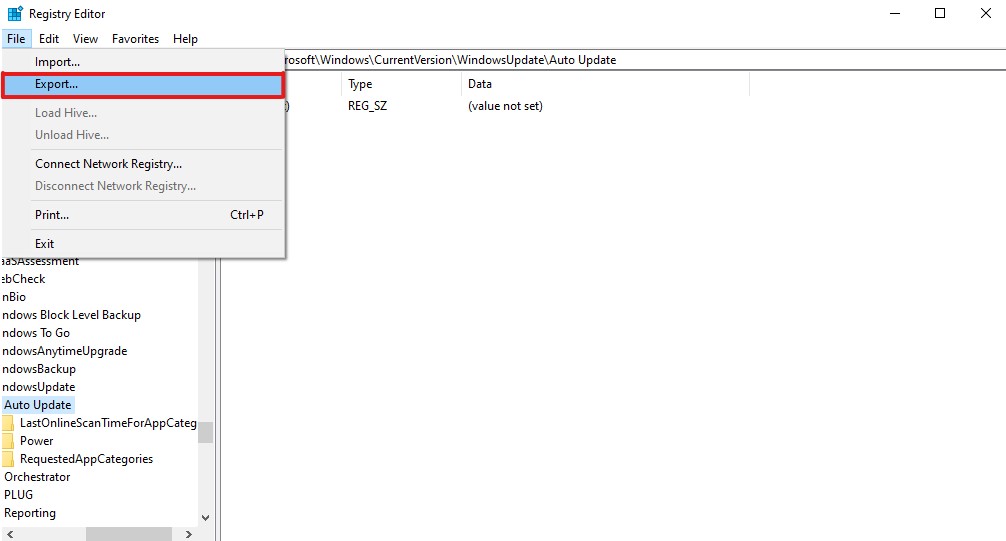
- Registry backup
- You can select the folder to the save the Registry file to after exporting it.
I’m done now. It appears that you have successfully made a registry backup.
Now, to modify the Windows registry settings, take the following actions:
- Initially, open Notepad.
- Copy this code now, then paste it in Notepad.
Version 5.00 of Windows Registry Editor
The word “DisabledByDefault” is 00000000.
“Enabled” = dword: 000000001
This file should now be saved with a.reg extension. To accomplish that, type update TLS.reg into the File name field and choose All files from the list of saved types.
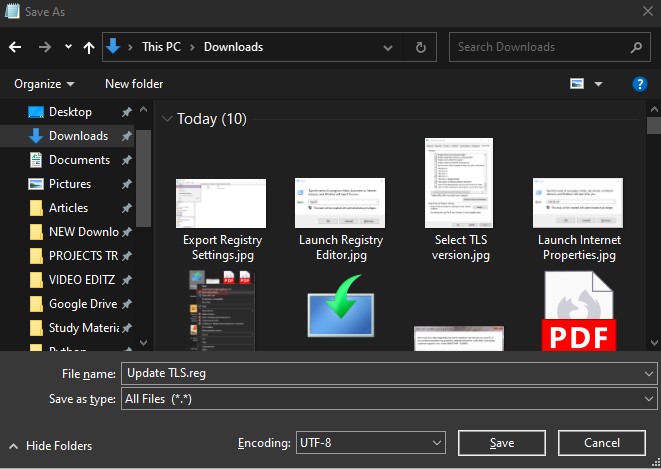
- Save Notepad files with the reg suffix.
- Find this file on your Windows computer now.
- To open the file and apply registry adjustments, double-click on it.
- Click the Yes option if the UAC prompt shows up.
Restart your computer once the file has been correctly executed.
Your machine will have TLS 1.1 and TLS 1.2 enabled after it reboots.
Start the Media Creation Tool now to see if the 0x80072F8F 0x20000 error has been resolved. If not, consider utilizing the next fix. Also check Peacock TV Stuck On Spanish Language
3. Make Sure Your computer meets the Minimum System Requirements
Should you continue to see this issue, it can be related to the setup of your system. If your computer specifications don’t satisfy the minimal system requirements to operate the Windows OS you wish to upgrade, this error can appear.
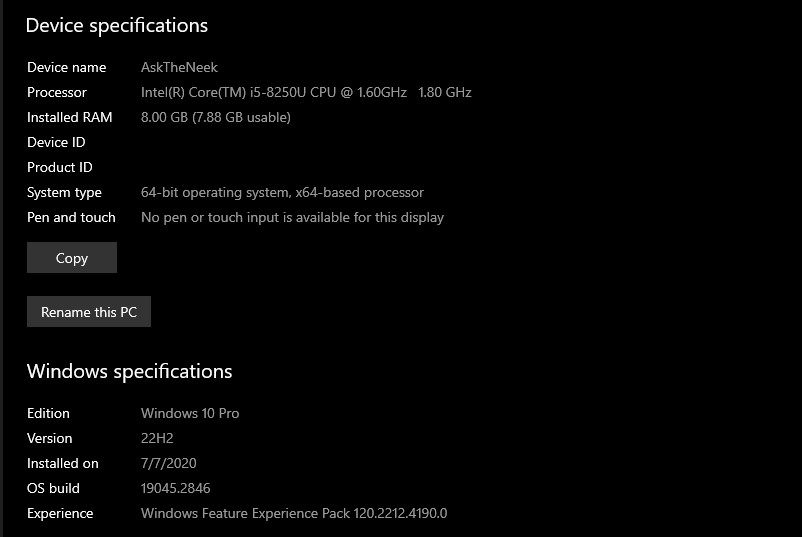
Verify that the Minimum System Requirements are met by your computer. If you are unsure whether this is the cause, just compare the setup of your machine with the shared Windows 10 and 11 requirements listed below.
The following minimal specifications must be met in order to upgrade to Windows 10:
- Processor: 1 GHz or higher in speed
- RAM: 1 GB for Windows 32-bit and 2 GB for Windows 64-bit
- Hard Drive: 16 GB for Windows 32-bit or 20 GB for Windows 64-bit
- WDDM 1.0 driver and DirectX 9 or later compatible graphics card
Windows 11’s minimal system requirements are as follows:
- Processor: a minimum of two cores, running at a speed of 1 GHz
- Memory: 4 GB or more
- Hard Drive: 64 GB or more
- Graphics card: WDDM 2.0 driver compatible with DirectX 12 or later
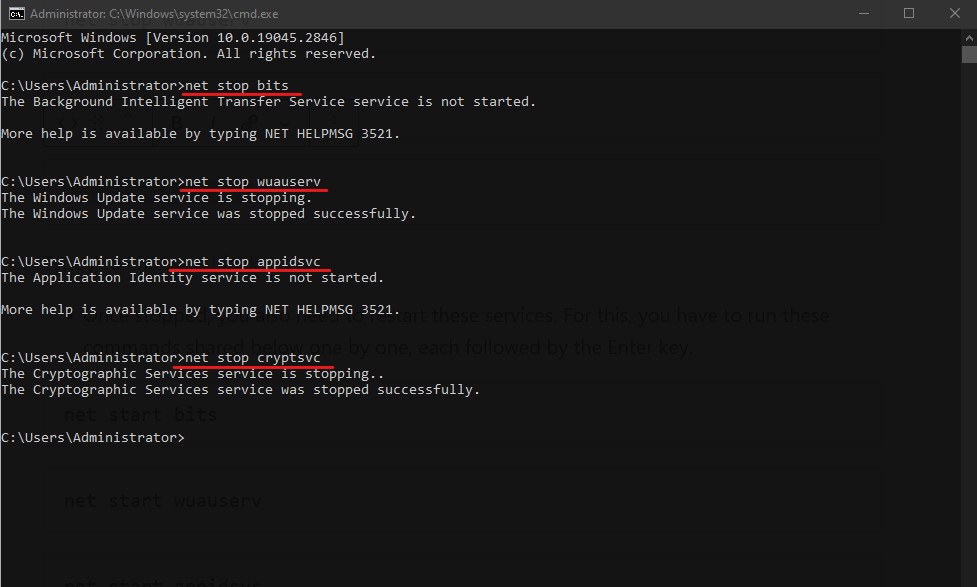
4. Restart Windows Services
If your computer satisfies the minimal system requirements but you are still seeing this error, it’s possible that certain Windows services are to blame.
In this case, you can try restarting Windows services and see if that resolves the error by following the shared remedy below —
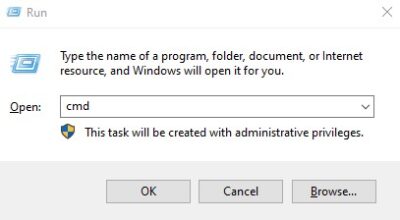
- Start the Command Prompt as an official first. To accomplish that, tap Win+R, type cmd into the box, and then concurrently press CTRL+Shift+Enter.

Next, type each of the commands listed below one at a time, pressing Enter after each one. All Windows services, including Background Intelligent Transfer Services, Application Identity, Cryptographic Services, and Windows Update, will be terminated by using these commands.
You must also restart these services after they have been halted. You must execute each of the commands listed below one at a time, pressing the Enter key after each to accomplish this.
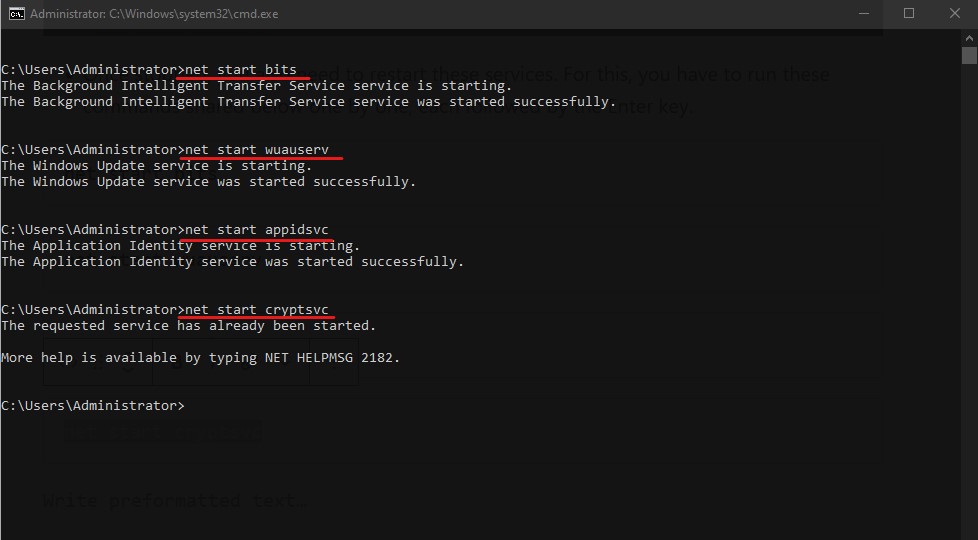
- Enter “exit” at the Command Prompt when all commands have been completed.
If the error has been resolved, try running the Media Creation Tool again with administrator rights after restarting Windows services.
5. Allow OS Upgrade from windows Registry
Notice: Editing the registry in any way could be deadly. To minimize any risk, I would thus advise you to make a backup file of the existing registry. In addition, I advise attentively following the instructions.
You may also be experiencing error code 0x80072F8F 0x20000 because Windows policy on your machine is preventing you from updating the operating system. If that’s the case, you can update your operating system by making adjustments to the Windows registry.
Here’s how to go about doing that:
- Start by bringing up the Run dialog box. All you have to do is hit the Win+R key to accomplish that.
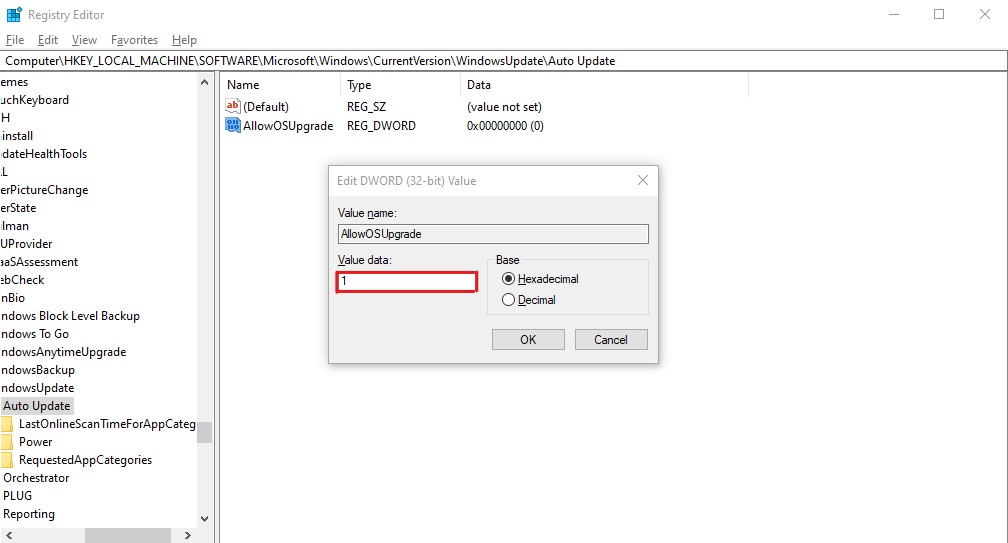
- Copy and paste the path below into the navigation bar, then press Enter.
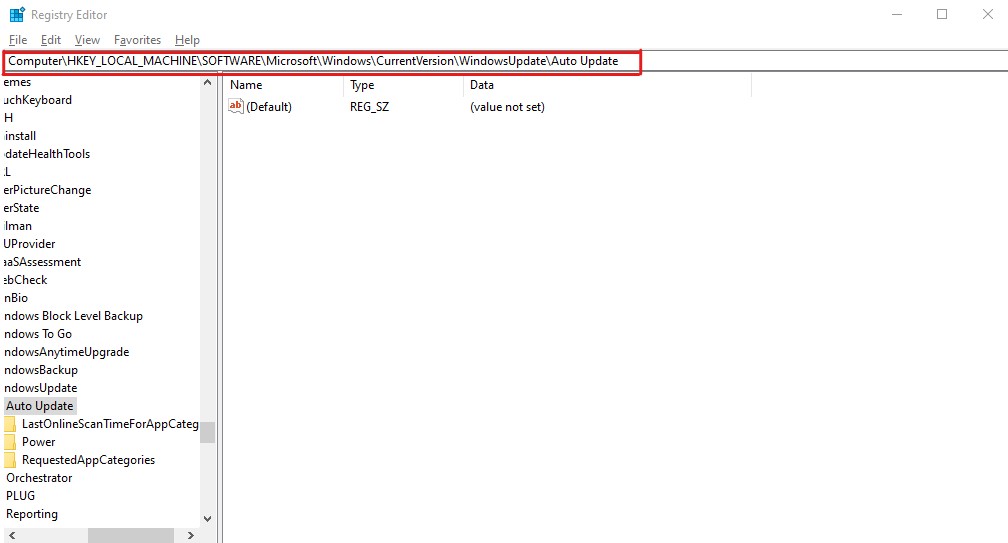
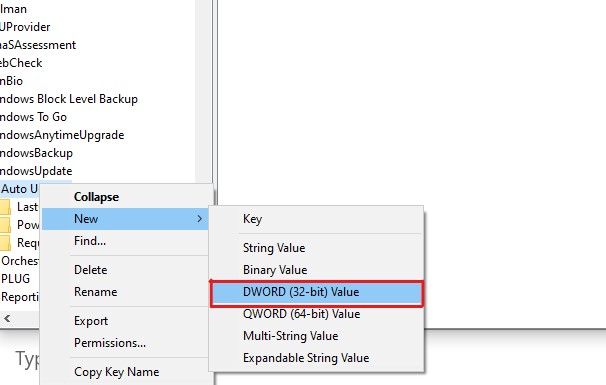
- To create a DWORD file named AllowOSUpgrade, you must right-click on the Auto Update, choose New, and then create the file.
- Double-click this newly generated file, select Value Data = 1, and press OK.
- Turn your computer back on.
I’m done now. Now that the modifications have taken effect, all you need to do is launch the Media Creation Tool to visit if the error has been resolved.
6. Clear SoftwareDistribution Folder
As previously mentioned, faulty caches and temporary files can occasionally cause error code 0x80072F8F 0x20000 to occur. Should the aforementioned remedies prove ineffective for you, consider deleting files from the SoftwareDistribution folder.
Why just this particular folder? This is because, each time you attempt to install a Windows update, all of the temporary files needed for the installation are kept in this SoftwareDistribution folder’s subfolder.
- This is where you can fix error code 0x80072F8F 0x20000 on your PC by clearing the SoftwareDistribution folder.
- Start by opening the Command Prompt. By pressing Win+R, entering cmd into the text box, and then pressing CTRL+Shift+Enter, you can do that.
You must now terminate Background Intelligent Transfer Services and Windows Update. You can do this by sequentially typing the following commands and pressing the Enter key after each one:
Terminate Every Windows Service 1
Keep the Command Prompt open because closing it will force us to restart these services.
Open the File Explorer on Windows. All you have to do is hit the Win+E key to accomplish that.
In the address bar, type the shared path shown below and press Enter.
The Software Distribution Folder is open.
Make a selection of every file in this folder and remove it. All you have to do is hit CTRL+A and then the Del key to accomplish that. If you are prompted for administrative permissions, click Proceed. Also check Ways to fix your organizations data cannot be pasted here error
7. Perform a Clean Boot
Return to Command Prompt to bring the services we just stopped back up. To do this, simply type each of the shared commands listed below, pressing the Enter key after each one.
To check if the problem still exists, restart your computer and launch the Media Creation Tool again.
Occasionally, long-running background apps can interfere or temporarily block certain services that are necessary for the Media Creation Tool.
If that applies to you, you can temporarily shut down these pointless programs so they won’t interfere with the Media Creation Tool by doing a clean boot.
These easy procedures must be followed in order to conduct a clean boot on Windows:
- Start by opening the Run window. To accomplish it, hit the Win+R keyboard shortcut.
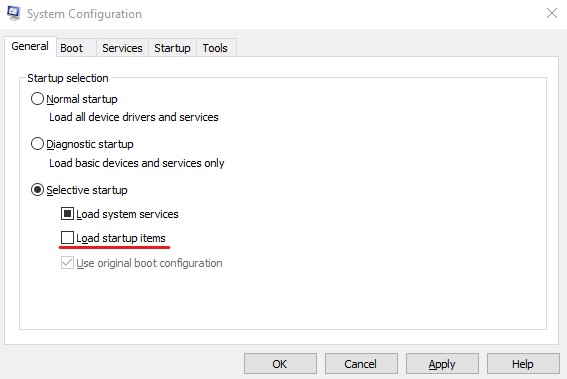
- Enter msconfig after typing it. You’ll be sent to the System Configuration application.

- You need to select the Demanding Startup option under the General tab. Ensure that the Load startup items option is not checked.
- Next, select the Services tab and make sure the option to “Hide all Microsoft Services” is checked.
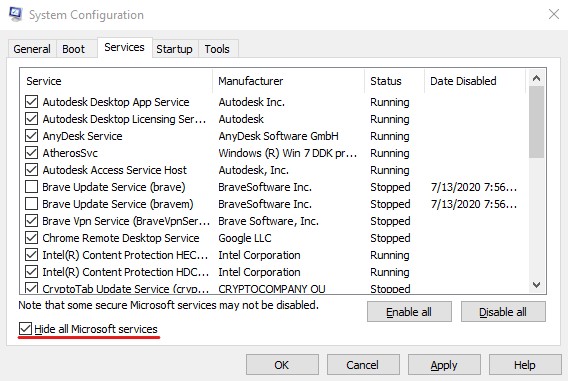
- Verify that all Microsoft services are hidden.
- Select the Disable All option now.
- To save all the changes you made, click the Apply and then OK buttons.
Restart your computer and use the Microsoft Media Creation Tool again after that to check if the error has been resolved.
8. Make sure your internet is good and stable
The Media Creation Tool needs a steady internet connection since it downloads system files.
In the event that the connection is unreliable or disruptive, error code 0x80072F8F 0x20000 may appear. Make sure your internet connection is reliable and provides a respectable speed.
9. Free up disk Space
By default, Microsoft Media Creation Tool downloads and stores installation files on your C Drive. You can thus see this problem if there isn’t enough space on your C Drive for the system files to download.
In this case, you should think about making some room on your C Drive so that all the files associated with the OS upgrade can download and run without any problems.
Closing Comments
Here is a comprehensive guide explaining how to resolve issue number 0x80072F8F 0x20000 on Windows 10/11. It’s hard to recommend a fix that might work for everyone because Microsoft hasn’t released an official statement explaining why this mistake happens. As a result, you must use the “hit-and-try” approach.


Add Comment